Showing posts with label Makeup. Show all posts

My Summer Makeup Palette

|


I'm all about electric hues this summer. I generally don't shy away from bright colors and this summer will be no different. Usually in the fall and winter, I stick to deep or silvery colors, but summers are for golds, iridescents, and my favorite - corals.
Corals look amazing on my skin, probably because of its yellow undertones. My all-time favorite colors are in the blue range so electric blue seemed like a perfect start (and it happens to look equally amazing on my skin):


This one is MAC Freshwater veluxe pearl eye shadow. It works well on both yellow and blue undertones so if you have a super- dark chocolate-y complexion, this color will pop just as well.


I looove this color. Why? Its the perfect combo of yellow and green. I was really looking for yellow when I found this. It's very pretty on darker skin tones but I'm sure will look good on lighter skin tones as well. It doesn't pop very much if you have lighter skin tone and yellow undertones so to spice it up, put it against a highly contrasting color (like against a black liner).


I notice that some dark-skin beauties shy away from bright colors. They tend to gravitate toward the safe deep, dark colors (like purples and dark browns).  But bright colors look amazing on chocolate tones! These tones make the colors pop, in a good way. So this summer, whether your skin tone is dark, medium like me, or light, don't shy away from bright hues.
The only thing I've noticed with bright makeup on dark tones is that if the color is not iridescent (is matte), it may come out looking  chalky. To prevent the chalky look, apply your powder eyeshadows over a light oil base (think jojoba oil). You can either do the mixing on a part of your hand or apply the jojoba oil to your lids and shadow over it. If you tend to have oily skin, skip the oil and use water instead.  Be very, very light on the oil (like literally just a q-tip dab).  Remember your makeup will clump into the creases of your lids over time  if you apply too much oil (not cute).
The color above shows up coral/iridescent orange-y on my medium-brown complexion. It's MAC Coppering veluxe pearl.


And last but certainly not least - who can forget the lips!  A pretty glossy pout is a must-have on those hot summer nights out on the town.  And this one is of course my fav color - coral. I really like it because it's actually a conditioning balm with sunscreen (spf 15) so it won't dry out my lips like some lip stains. It's also a subtle coral.  You can apply a bit for just a hint of color, or layer it on for a full-blown orange-y pretty  pout.  It's MAC Gently Coral Tinted Lip Conditioner if you like.

So there is no reason not to look cute this summer, whether its with your little twa, your full-blown 'fro or whereever you are in-between.  I did a series awhile back about playing up your best face features to complement your cute natural.  If you missed it, here are the links:  EyesEyebrowsLips and NailsSkin and Cheeks.

And, yes, I will show you the outcome of my makeup application.  I have a party tomorrow night. If I'm not in too much of a rush, I will try to remember to take some good shots to put up.


Makeup -TWA Pt. 4

|
Eyebrows

The difference between looking like a crackhead and looking like a diva.

Eyebrows will make or break a twa look or any short look but especially a natural short look. Think about it, your hair is very curled or kinky and very short. It looks like it has a mind of its own (which it probably proudly does), so you want the rest of you to look put together so it looks like you deliberately styled it that way and that you are not a victim of crack-cocaine, fashion-failure or anything else.

I get my eyebrows threaded. Its up to you, if you wax or tweeze or thread. I like threading because its no more painful than waxing and I don't have to worry about my skin being peeled off in the process (happened to me several times) and it looks cleaner to me. I think of those indian women who are masters at making up their faces.

But to keep your eyebrows looking extra-good:

Tools

Eyebrow brush and comb
Eyebrow shadow or filler and applicator.
Wax or butter

Tip

Ask whoever does your eyebrows to trim them with scissors. The person who does mine, combs them upward and trims the longer hairs so they look polished. Don't ever let anyone use a razor on your eyebrows, its a recipe for ingrown hairs and other disasters. Also, the person is more likely to make mistakes resulting in misshapen eyebrows since a razor is not easy to hold.

Directions

1. Comb or brush eyebrows in the direction you wear them.

2. Using a very narrow and small applicator brush, apply wax or butter (I actually use shea butter since I ran out of wax which might even be better because its more nourishing for my skin and eyebrow hairs).

3. Use the brush and butter/wax to smooth your eyebrow hairs in the direction you wear them.

4. Dab the same brush in the filler (usually a matte powder that matches your eyebrow color) and make a sweeping line toward the ends of your eyebrows (inward out) to make a sharp outer edge.

5. Fill in any areas that look sparse, with the filler. Make sure to be light-handed so you don't end up looking like the cookie monster. Even though your eyebrow color looks black, it is most likely off-black or brown so you should probably never use a black filler. A dark brown one when applied multiple times will look black anyway.

And that's all folks. This was exhausting for me, but hopefully this series has been helpful for those of you unsure about what to do to enhance that twa and nstwa. If you have aaannnyy questions, tips for me - anything - please, please let me know. I am always learning.
Later.

Makeup -TWA Pt. 3

|
Lips

So my lips are my next best feature (remember I said pick two). I play them against my eye makeup for an overall effect. This means if I have alot going on with my eye makeup I keep it light on the lips and vice versa and sometimes I keep it light altogether with just foundation, mascara and a nude/sheer lip color.

In this case, to complement my liquid eyeliner and eyeshadow look, I would do this:

Tools

Lipstick (matte only if you want stronger color) (my fav now since summer is coming is a reddish-orange - mostly orange - color. Its hot!)
Lip salve
Clean face towel
Gloss color (for that extra lip shine if its a nighttime look)

Directions

1. Clean your lips before applying lip color! This way your color won't clump and leave little blotches on your lips - not cute!).

-Dry your lips first by gently wiping with dry towel.

-Dampen a part of the face towel under warm water or in warm milk if you have time and you're in the self-pampering mood. Then, using the damp part, gently wipe your lips again, rubbing to remove dead skin (which will appear whitish). Once your lips feel clean and smooth, dry again by wiping gently with dry side. Be gentle, you don't want to bruise your lips!

2. Apply lip salve. Rub unto lips making sure not to apply too much.

3. Apply lip color. The amount of color you want on your lips will depend on how much salve you added since the salve will dilute the color. If I want alot of color I will actually wipe away some of the salve ((I add the salve to soothe and protect my lips first) before adding the lipcolor.

-If you want subtle color, apply alot of salve. You can use a brush to apply lipcolor, I'm lazy so I just stroke it on, making sure to get the sides and inner parts of the lip as well. If my color is bold (as in the hot pink color I wear sometimes) then lipliner is a must. Make sure to use a lipliner that is similar to but darker than your lipcolor. Again, a beauty consultant can help you choose a complementary lipliner.

4. If I am going for a matte look but not using a matte lipcolor, I will wipe away almost all the salve, then apply the lipcolor and, using a piece of paper (paper towel and tissues will usually leave pieces behind) dab away the shine. You may have to do this applying and dabbing away several times to get intense color without the shine. Be patient and you'll get there. You can also mix lip colors for a unique color, be creative with it.

Don't forget to re-apply lip salve at the end especially if you go matte but the weather is cold, chapped lips with lipstick is not a good look! For a high shine look (great for nighttime looks) skip re-applying the salve and apply a gloss instead. If the gloss is sheer, it should not mess up your lip color.

Nails

Tools

Filer
Cuticle-trimmer
Light oil

Directions

Just shape them, however you like them. You don't have to get them done every two weeks. I almost never get my nails done. I just cut my own cuticles and shape with a filer. When I'm in the mood, I apply a color that pops like orange or dark blue.

I don't leave color on my nails for long because they tend to make them yellow and brittle. But if you do leave them on your nails for long, wipe your nails with pure lemon juice or quickly rinse with apple cider vinegar after you remove the color.

My basic thing, is just making sure my nails are always clean and well-shaped. And now that I use all these amazing oils in my hair, I almost never have cuticle problems, partly the result of HIF (hand-in-'fro) disease but at least something benefits. :)

Next post is the last but definitely not least part of our beauty series....

Makeup - TWA Pt. 2

|
Ladies, enhance those amazing cheekbones or that pretty complexion!

Cheeks
If your cheek is your best feature, the key here is color that complements your skin tone. See a beauty consultant (like the ones at the MAC counter) to find the color that works for you - just make sure that it's subtle.

Tools

-Blush compact

-Large narrow or rounded brush

-Shimmer or glow

Tip
The shimmer is the trick. I call it shimmer but its really a very subtle 'non-color' that makes your skin glow. By 'non-color' I mean it should not show any other color than your natural skin tone, it should only show a shimmer when light hits it. The key is to get a quality shimmer or glow. I have found that with shimmer, quality matters. The size of the shimmer particles are often larger in shimmer products by lower quality brands.

You want something that looks like fairy-dust, matched to your complexion. I use MAC Fawntastic Cream Color Base and MAC Indianwood Paint.
Cheat
Here is a cheat: If you have medium-brown complexion with yellow undertones (do you look yellow in some areas or some lights?) go for a gold shimmer. MAC Indianwood will work but cheaper brands like CoverGirl sell good gold shimmer as well. Make sure the shimmer particles are dust-like or else it will look tacky and childish. (If you can pick each shimmer 'dust' from your face - not the right one)


Directions

1. Smile
2. Apply a sweep of blush where your cheeks stick out the most, maybe a hair above where they stick out the most.
3. Using another blush brush (may be smaller) apply a sweep of shimmer above where you applied the blush, (should be under and toward the outer edge of your face). Make sure the stroke is very light and even if you don't see it, don't apply more. It's there. Applying too much will make you look clownish. If you don't see it, take a few steps back from your mirror, you should see it when the light hits that part of your face. Play with it, have fun with it.

Skin
I was not blessed with flawless skin. I've had to work at it. And over the years I have noticed that my skin is very responsive to what I put into my body (both good and bad) and reacts to my stress levels. So I manage that and it has helped my skin alot. When I thought about going natural, I knew my skin had to be on point because I could no longer hide behind long bangs like I used to.

I found that when I eat products high in vitamin A, within a few days my skin looked clearer and glowed.
My High Vitamin A Foods

Carrot juice (jamaican-style) with parsley (my own twist)
Cod liver oil (the emulsion because the oil tastes just nastay)
Spinach salads with lots of tomatoes
Avocados, avocados, avocados
Baby carrots and dip
Pecans

Tools

Blemish concealer
Powder foundation.
Face moisturizer - Even if you have oily skin you should always protect your skin with a moisturizer (I have oily skin and I love Burts Bees marshmallow face cream - gives a glow - without making me look oily).
Eye creme (I love Burts Bees royal jelly)
Tip

Eat something with vitamin A each day or take a supplement (The body absorbs vitamins/supplements in food-like or liquid form better)

Another tip, especially if you tend to have problem or sensitive skin, keep wearing makeup to a minimum. I am a strong believer in letting skin breathe - plus makeup is drying even if you have oily skin so if you're spending a day in or just hanging out at your fav casual local spots, well-groomed eyebrows, lip salve (and maybe concealer if you're self-conscious) is most likely all you need.

Directions

1.Wash face and apply moisturizer and eye creme (as you get older or if you have a super-busy and stressed life, eye creme becomes a must to keep bags and under-eye circles to a minimum. Start using this stuff before you see problems to prevent you ever having to deal with them).

2. Let the moisturizer dry. Skin will absorb what you put on it and the moisturizer is supposed to protect your skin (among other things) so don't apply makeup until your moisturizer has 'set.'
3. Once the moisturizer is 'set' (your skin feels normal again), use a small narrow or round brush to apply concealer to blemishes. Oftentimes I stop here. If your concealer is good and blends well with your skin, and if you have not had to apply much you may not need more, just make sure it is blended in well. Check your skin in a well-lit place to make sure.

4. If I am getting all dolled up, I then apply a powder foundation (because my skin is oily). If your skin is dry, use a creme foundation and make sure it is non-comedogenic (doesn't cause breakouts) especially if you have problem skin like me.

See a beauty consultant for the perfect concealer, blush and foundation for your skin.

I know some of you, like me, like to shop on your own and don't think you need 'consulting' and you may not if you know what colors look good on you (I like to think I do) but for foundations, blushes and concealers, they will be the best at guiding you to the right products.

If they know their stuff, they won't just look at your skin tone, but your undertone as well (as in, is your undertone yellow or blue etc?).

Here's a tip: Darker skin tones will more likely have blue undertones so ask for products like lip color that have blue undertones, and medium to lighter skin tones will have more yellow/orange undertones.

There are red lipsticks for blue undertones and ones for yellow/orange, so it helps to know your skin.

When I apply foundation, I swirl the blush in the powder, shake off excess and very lightly 'sweep' my face. Very lightly may mean doing this dab and sweep process several times but I don't want to force the foundation into my pores - I want the foundation to sit on the moisturizer on my face - so it helps to use a light touch. If its powder, the more you apply, the more you will see the change, even with light sweeps.

That's all, Curlies. Smooches.

Makeup - TWA Pt. 1

|
I am sharing my trade secrets with you, my twa divas, just cuz  I am so proud of you.

So....

Some of us transitioned for months, close to a year, before doing the big chop.  Others of us, either out of impatience (me) or sheer bravery and badass, did the big chop two, three, four months in.
Some of us found our way easily.
Some of us were like, "what the heck, why do I look like a boy?!" (or other phrases of amazement and confusion).
Some of us are doing just fine figuring it out but aren't too proud to say we are still learning the best things for ourselves.

To all y'all, my twa companions on this journey, I have decided to share everything - yes I saaaidd everything *giving side eye* on what knowledge I have accumulated over the years pre- and a little post-twa for enhancing our already beautiful selves.

This is a beauty post. I may do another post about fashion, maybe.
I am breaking this out into a series of several posts because it's loong.  Just think of the series as my beauty tell-all (I like the sound of that). Maybe you'll find some tips to help enhance what you already know and maybe it will save you from going back to relaxers if you are still in the 'what the heck have I done? I look like a crackhead' stage of your journey *forced smile.*
Smooches.

Here we go:
So you all know that during our twa and nstwa stage, our face is all anyone who meets us see. Our features are brought into the spotlight including flaws and blemishes and for some of us it means that certain things about our face that we have been insecure about and been able to hide behind our long, relaxed hair, no longer have a hiding place.

For some, the twa stage brings a new discovery about the beauty of  their features that were lost behind longer hair and they get compliments galore about how much short hair 'fits' their face and brings out their features.
For others, this stage only brings out more insecurities. These less secure new naturals may feel their features are too 'weird' or their face and head too 'weird'-ly shaped to look cute with a teeny weeny 'fro.

Well I am here to tell you we can all be cute with little to no hair on our heads. The secret is changing how we put it all together.

For me, my biggest concern was that I'd look like a boy. I'm already long and thin with a narrow, face that sometimes looks too serious to me. I was sure, people would start mistaking me for a boy (at least until they see the 'twins' which are unmistakeable. Love you guys *looking at chest*).

I also thought my head was weirdly shaped. I wasn't sure why, but even though others would tell me my head, like my face is small, I just thought it was too big. I mean I have my horror stories of going shopping, finding a cute hat, and falling in love with it -  only to find out it wouldn't fit my big-ass head.
 (Maybe all the hats I tried on were size small?? *tsk*).

So, I'm going to share some tips about my beauty regimen namely, how it changed with my chop.

Let's start here: What, to you, are the best features on your face? Your eyes? Your lips? Those amazing cheekbones?
You have to think of at least two and I'll tell you how to make them pop.
The key is to play each up or down in relation to the other to get that flawless look.

Eyes
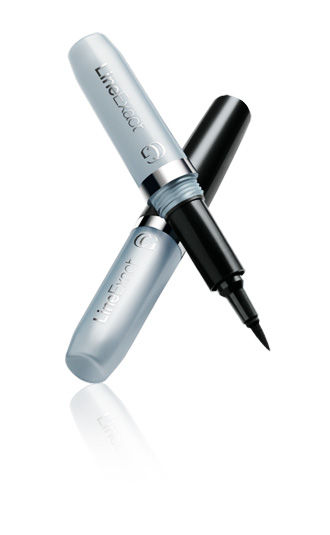
My best feature, I think are my eyes. And what better to make my eyes look more cat-like, feminine and sexy, than liquid eyeliner.
Yep, the one thing I hated to do, I would do everyday for work. Why I hate liquid-eyeliner? I always messed it up.

So my goal was to perfect it. To become the best liquid eyeliner-applying-chick ever. As long as it's not time-consuming or overly complicated, I can do it. And so can you.

Tools
-Q-tips - yes I said it right - you will need q-tips. Why? To erase mistakes
-Water
-Eyeliner: The secret to applying liquid eyeliner is - well - a good liquid eyeliner!
Good ones I've found:
Benefit, MAC, Maybelline and CoverGirl. I use CoverGirl and sometimes MAC FluidLine with a flatbrush applicator. The process for applying the MAC FluidLine is different so I'll explain the CoverGirl one.

Tip
-The key is that the applicator is easy to hold,  it goes on smooth and has a very pointed tip.

-When I apply liquid eyeliner, I start at the outer edges of my eyes, as far out as I want the 'tail' of my eyeliner to go. I keep the 'tail' of my eyeliner narrow if its for work and go more elaborate if I'm going out at night.

-Remember this tip: Day  makeup should be light, mostly neutrals. You want to give the illusion you naturally look that way -  NOT that you applied tons of makeup to get that way. Totally unsexy.
At night, you can go crazy with it. The darker atmosphere means your day makeup will not show up as much so use it as the opportunity to go all out (but still not look overdone).

Directions
If I use my CoverGirl liquid eyeliner:


1. Draw a sweeping line from the edge of the eyes (farthest from your nose) inward. Don't worry about where the sweep ends, the key is to get the edge right (the hardest to do). Making it a 'sweep' means you have to loosen your wrist somewhat which will help reduce shakiness in your hands.

Think of drawing (if you've ever taken an art class you know what I'm talking about). You may need several more inward 'sweeps' to get the tail the way you want it. Once you have your tail, draw your lines inward toward the inner edge of your eye (closest to the nose). Don't freak out if the line ends up really thick and looks shaky, thats what the q-tips are for.

2. Wet your q-tip under running water (do not use oil, it will spread and make your line smudgy). If the q-tip is too wet, dab it on a towel to get rid of excess water.

3. Going from the inner edge of your eye (the part closest to the nose) outward, use a sweeping motion to thin and smooth the line. Be patient, you may go through several q-tips to get the line perfect (if you're a perfectionist).

Cheat
Here is a cheat if you are in a hurry. Instead of working to clean up the entire line, clean up the outer edge, make your tail sharp and angled however you like, and then smudge the parts of the liner that are more inward (directly over the eye). People will mostly notice the outer edge anyway, and the key is to get it cat-like. If I'm going out at night, I will add color above the liner.

4. To add color above the liner:
-Choose a color (please don't pick one that matches your outfit! *side eye*).
Pick one that complements the colors in your outfit. For example, if you're wearing brown, green eyeshadow is a perfect complement. If you are wearing blue or green, silver eyeliner is a great complement. You get the picture.
Just dab it on the eyelid with a brush or your fingers, and then I blend the top part of the liner into the shadow with a rubber-tipped applicator. It looks like this:


I will also add gold or brown shimmer to the insides of my eyes where the upper and lower lids meet. And, of course, finish with mascara (if I didn't apply liner to the lower lids, I make sure to apply mascara for an old-school look)
Get creative with it. Find what works for you.

Part 2 I'll go over enhancing those standout cheekbone and giving the illusion of flawless skin.
In the meantime, and for inspiration, here is a pic of a gawwwwgess model rockin' a twa and flawless makeup:

Isn't she purrtty?